The thought
“At-home color is good for people who have a lot of gray or those who can’t get to the salon easily,” says Doug Macintosh, color director at Kieran McKenna Salon in New York City. “Coming into a salon isn’t always convenient or affordable and that’s when a box color is helpful.”
Here are top salon colorists’ advice for making the most of DIY permanent color so you have the best results at home.
Know When You Have to Go to the Salon
There are some color jobs that require a pro. “The further away you want to go from your natural color, the bigger reason you need to go to a professional,” says Colin Lively, a colorist at Eddy’s on Coventry in Cleveland, OH. Macintosh says that going more than two shades lighter or darker than your natural color sets you up for unpredictable results.
Bleaching or lightening your hair can also be a challenging job for an amateur. “Without knowledge of how color lifts, the density of hair and hair texture, it’s hard to gauge how long to leave on bleach to get the result you’re looking for,” says Nicole Brumley, owner of Kiiro Hair Lab in Springfield, MO. “I’ve had to fix quite a few mistakes with DIY bleaching, so I wouldn’t do home lightening.”
Select the Right Shade
To match your color, standing under the store’s lights won’t help much. “It’s essential to go outside to see the true color and take a close-up picture of your hair,” says Jet Rhys, president of Jet Rhys Hair Salon in Solana Beach, CA. Having that image of your shade in daylight will be helpful to match with the picture on the box, she explains.
Brumley also says your eye color can be a good guide. She says blue eyes often pair well with cooler hair color shades that have ash or a word that implies blue in the description. For hazel or brown eyes, warmer chestnuts and golden colors are a good complement.
“When in doubt, opt for the lighter shade,” Macintosh says. “If the color comes out too dark, you can’t lighten it at home but you can always darken it.”
Do a Patch Test
The boxes all suggest performing a patch test before applying the color to your entire head. Macintosh says this is essential. “You want to make sure you’re not allergic to the color because you could have a reaction,” he says. His advice is to mix a small amount of the kit, apply it to your skin behind your ear or near your elbow, and wait at least 24 hours to see if you get a rash or any irritation just to be safe.
You Might Need More Than One Box
Your hair length and texture will impact how many boxes of dye you need to completely color your hair. “For a first-time application you will likely need more than one box because they are designed for touch-ups or regrowth,” Lively explains. “If your hair is past your shoulder, buy two boxes to be safe.”
Macintosh advises buying more than one box at a time to be prepared. Mix one box and you have the second box handy if you need more color or, worst case, you have a box ready for the next time you need to color.
Prep to Avoid Stains
Staining around the hairline is a telltale sign of at-home color. Rhys suggests using Vaseline as a barrier around the hairline and the tops of ears to prevent the dye from adhering to the skin in these areas. Brumley is also an advocate of this technique, but she warns to be very careful to keep the Vaseline away from your hair because it will also block the pigments from getting into your hair.
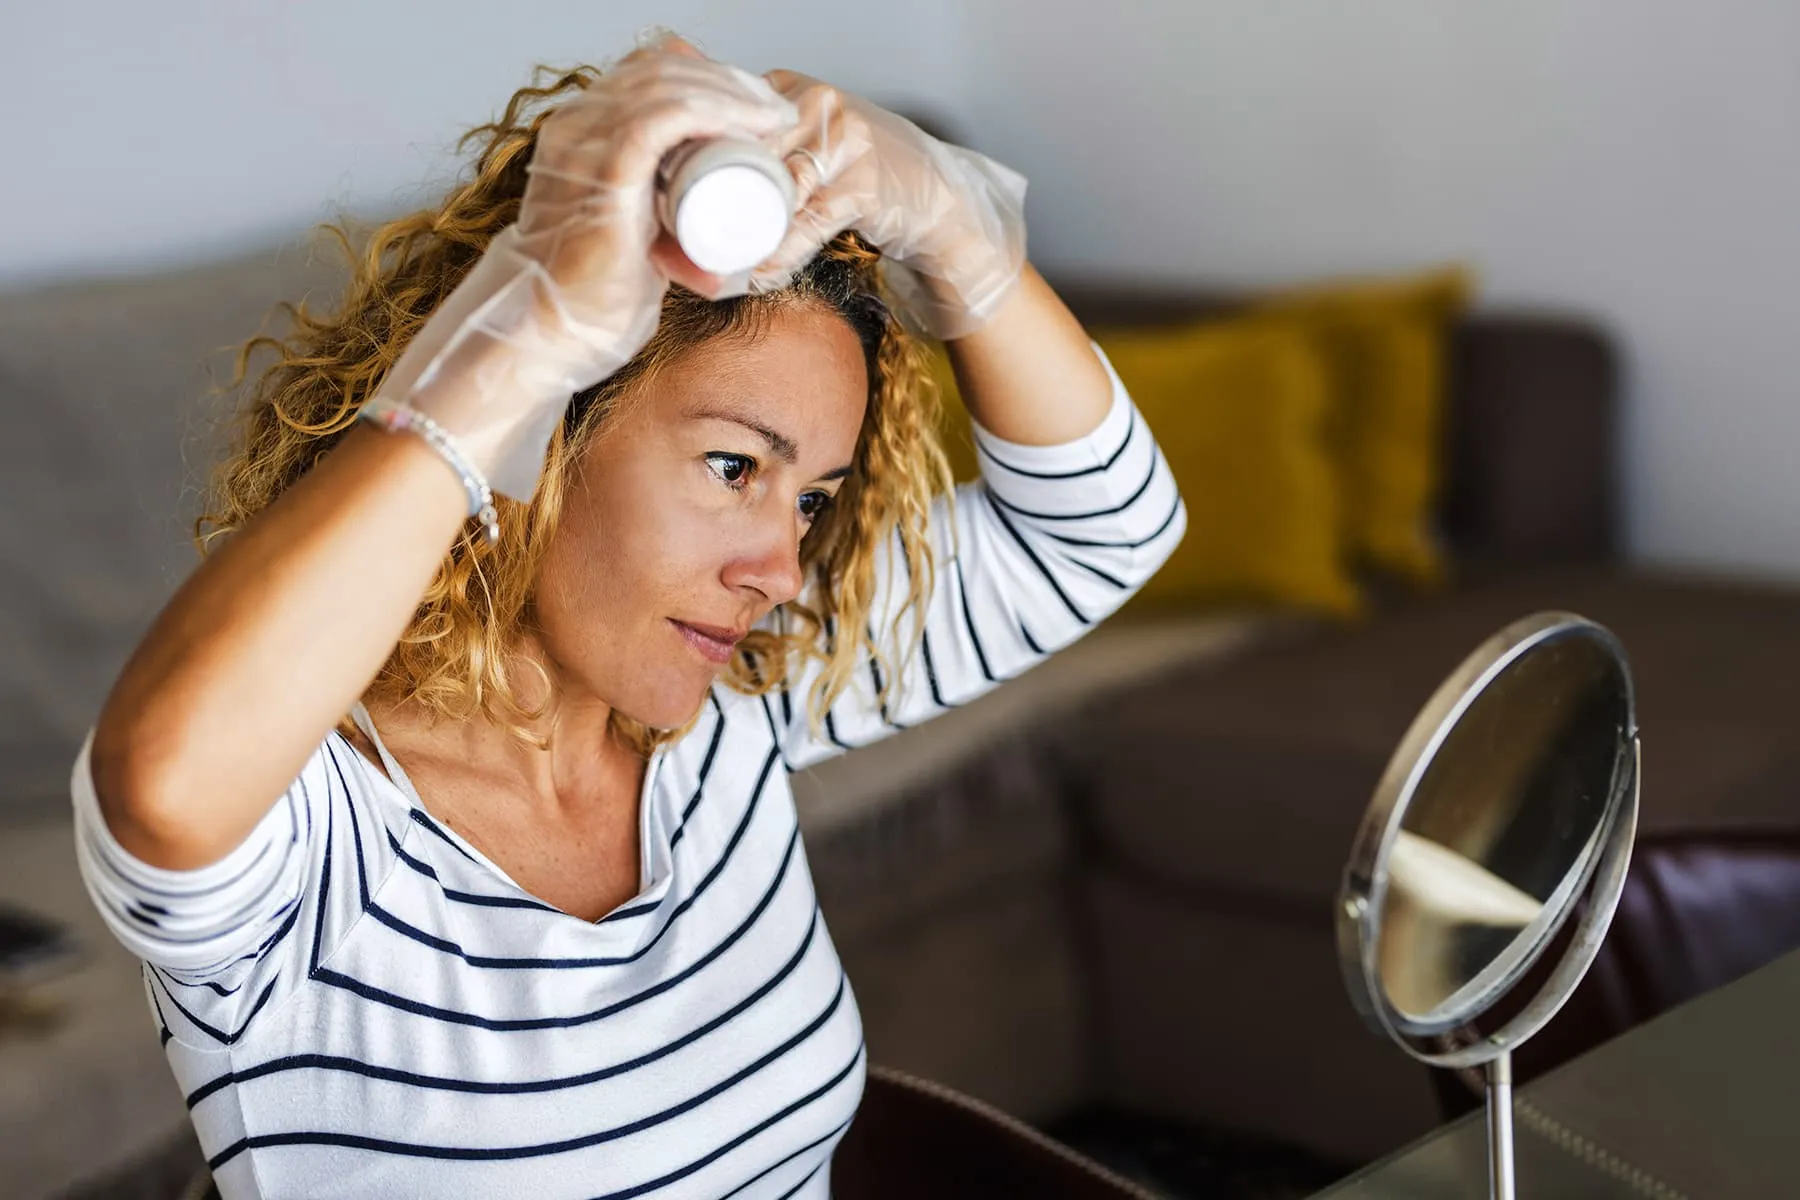
Upgrade Your Tools
While the box kits usually come with gloves, the experts suggest an upgrade for a better experience. “I advise getting gloves from the drugstore because the gloves in the box are thin, flimsy, and tend to tear,” Lively says. “They’re not really ideal for dye application.”
Some kits contain brushes, but investing in a tint applicator brush from a beauty supply store can also help ensure for a seamless application, Rhys says. The brush helps to evenly spread the color on the hair rather than the unpredictable blob that can come out of a bottle nozzle.
Apply Like a Pro
Don’t try to cover your entire head at once. Section your hair into quadrants, Brumley says. Part your hair from forehead to nape and from ear to ear and clip each of the four separate sections. Then you want to apply the color as close to the scalp as possible. Macintosh says you might want to consider enlisting the help of a close friend who can see where the dye is going. He also advises starting with the back sections because they are darker and more resistant to color, so you’ll want to leave the dye on a bit longer to process.
“When applying the color, make sure you firmly press the color on the root area with the brush,” Rhys says. “You want to feel the color on the scalp. You’re not going to get good results if you’re feathering or lightly pressing on the roots.”
Follow the Directions
“Box color is a progressive tint,” Macintosh explains. “So the longer you leave it on the longer it develops.” You should follow the directions on the box and monitor your hair to see how it’s reacting to the dye. And Brumley says you should follow with the conditioner included in the kit. “The conditioners drop the pH of the hair to close the cuticle so the color will last longer, so you should always use them.”
Call for Help
If you don’t like the results, it’s probably best to seek the advice of a professional rather than try to troubleshoot on your own. Macintosh says you can try the 800 number on the box to seek the manufacturer’s recommendations. “The best advice might be to come into a salon and see a professional because you don’t want to make it worse,” Macintosh says. “If you start doing too much on your own, you risk causing too much damage or putting too much pigment into it so there’s not much that can be done to repair the results.”
Find more articles, browse back issues, and read the current issue of WebMD Magazine.