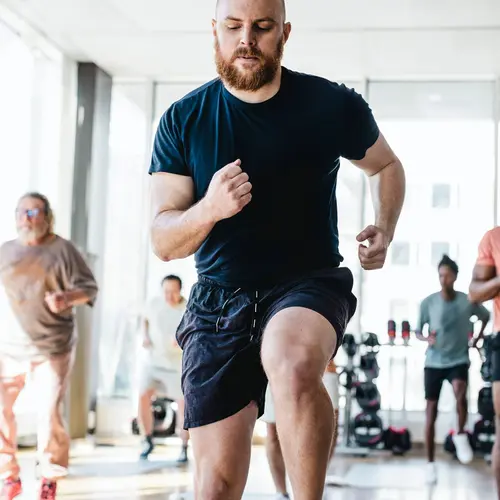
Tricep dips, also sometimes just called dips, are a popular exercise because you don't necessarily need to do them in a gym. They work several key arm and shoulder muscles in addition to your chest muscles. Additionally, it's easy to make them harder or easier with a few simple adjustments. So, even if you are not used to working out, there's a dip variation you can try to begin building strength.
What Is a Tricep Dip?
Tricep dips are an exercise during which you raise and lower your body using your arms, primarily your tricep muscles.
What Muscles Do Tricep Dips Work?
Triceps. As the name would suggest, tricep dips work your triceps. These important muscles on the backs of your upper arms help with elbow extension movements.
Trapezius muscles, aka traps. This is a big muscle found in your neck and upper back. It spreads from the base of your neck all the way across your shoulders and goes all the way down to your midback. It helps you maintain good posture and move your entire upper body, including your head, neck, and torso.
Shoulder muscles. These important muscles help stabilize the shoulder joint, keeping your shoulders healthy. They also help you move your arms.
Pectoral muscles, aka pecs. These muscles in your chest help to make certain arm movements stronger.
Abdominal muscles. Your abs are located in your abdomen and have several important functions, including:
- Keeping your organs in place
- Supporting almost every movement
- Help with going to the bathroom (both urination and defecation)
- Assist with coughing and sneezing
- Help during childbirth
Directions for Doing Tricep Dips
Follow these steps to do a basic tricep dip:
Step 1. Sit on the ground with your knees bent and feet flat on the floor. Place your arms behind you on the floor with your fingers facing forward.
Step 2. Lift your hips off the ground, just a few inches. All of your weight should be in your hands and feet.
Step 3. Lower your body down to the ground by bending your elbows.
Step 4. Press down with your hands to straighten your arms and raise your hips and body back up.
Step 5. Repeat as many times as desired or as prescribed by your exercise program.
Tricep Dip Adaptations
If it's too hard to lower your body the full distance, just go far enough to feel your triceps working. As you gain strength, you'll be able to go lower.
You can make this exercise easier by moving your feet closer to your body and bending your legs or harder by moving your feet even further out.
There are also many types of dips you can try in order to:
- Work different muscles
- Make the exercise easier
- Make the exercise harder
Bench dip. You can do this type of dip exercise anywhere where there's a stable chair, stool, or bench. It doesn't have to be a bench at a gym. For example, you can use the bench of a picnic table.
Step 1. Stand in front of an elevated surface, like a bench, chair, or stool.
Step 2. Slightly bend your knees and lean back until your hands are on the surface. Your fingers should be facing forward and curled over the edge of the surface for grip. Your weight is now primarily in your feet and hands.
Step 3. Move your feet forward until your legs are straight. This puts most of your weight in your hands.
Step 4. Bend your elbows, lowering your body down until your upper arms are parallel to the ground.
Step 5. Extend both of your arms, returning to your starting position.
Step 6. Repeat anywhere from 5 to 20 times.
If you do a bench dip with a wider grip, you'll focus more on your chest muscles than your triceps.
Bench dip with rotation. This exercise is very similar to the one above, with one key twist.
Step 1. Perform a bench dip as described above.
Step 2. Remove your right arm from the bench and move it across your body, rotating from your center and activating your core.
Step 3. Return your right arm to the bench.
Step 4. Do another bench dip as described above.
Step 5. Remove your left arm from the bench and move it across your body, rotating from your center and activating your core.
Step 6. Repeat as many times as directed in your workout.
Parallel bar dip. This type of dip requires some equipment. Luckily, equipment for dips is found at most gyms and outdoor bodyweight exercise areas. This type of dip is more challenging than the other variations listed because all of the weight is in your hands. But there are ways to build strength to work up to this movement.
Step 1. Find a set of parallel bars. This is a set of two bars that are parallel to the ground, usually slightly higher than elbow height.
Step 2. Place your hands on the bars with a strong grip. Tighten your core and lock your elbows so your arms are supporting most of your weight.
Step 3. Lift your feet off the ground by bending your legs slightly. All of your weight is now in your arms.
Step 4. Bend your elbows, lowering your body, until your elbows are at a 90° angle.
Step 5. Straighten your elbows, raising your body back up to the starting position.
Step 6. Repeat 6 to 12 times.
If this is too hard, there are a few ways to make it easier:
- Try it with your feet on the ground but holding less weight on your feet.
- Try it with just one foot on the ground.
- Attach a resistance band firmly in between the two parallel bars. Rest your knees on it to carry some of the weight as you perform your dips.
Benefits of Tricep Dips
Tricep dips are great because you can do them almost anywhere. Many people can even take a break at work and do a few repetitions. Other benefits include:
- They can improve your strength for other pushing movements, like push-ups and muscle-ups.
- Strengthening your triceps can help you perform daily pushing activities, like getting up from the couch, better.
- You can easily tailor the movement to your current ability.
- They can improve the look and size of your chest and arm muscles.
Tricep Dip Mistakes to Avoid
Some experts believe dips can be dangerous because the movement puts stress on the front of the shoulder joint. Doing this movement can cause a pinched nerve and other injuries. So, it may not be the best option for people who lack flexibility in their shoulders, have shoulder injuries, or have arm injuries. You should consult with your doctor or a personal trainer before adding dips to your fitness regimen if you have a history of shoulder or arm issues.
Follow these safety tips while performing tricep dips to help prevent injury. If you feel pain while doing dips, stop right away. If the pain doesn't go away after resting for a few days, contact your doctor.
- Keep your shoulder blades back and down to keep your back straight and to stop your shoulders from rounding forward.
- Activate your core muscles, keeping your spine straight to prevent overextension.
- Keep your neck straight during the exercise. Don't look up or down. This avoids putting strain on your neck.
- Place your hands directly underneath your shoulders. Make sure your stance is not too wide or too narrow.